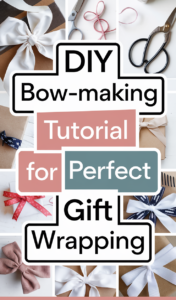
Gift wrapping is one of the most delightful parts of presenting a gift, but it can feel overwhelming when it comes to adding that final, perfect touch. A beautifully made bow can elevate any gift, making it feel more personal and thoughtfully put together. If you’re looking to add that extra flair to your wrapped presents, this DIY bow-making tutorial will guide you through creating the perfect bow, whether you’re using ribbon, fabric, or any other materials you have on hand.
Materials You’ll Need
Before diving into the bow-making process, gather the following materials to ensure you have everything you need:
- Ribbon (fabric, satin, burlap, or any ribbon of your choice)
- Scissors
- Wire or floral wire (optional, for a more structured bow)
- Hot glue gun (optional)
- Decorative accents (such as beads, buttons, or small ornaments)
- A ruler or measuring tape (optional)
Step 1: Choose Your Ribbon
The first step in creating a stunning bow is to select the right ribbon. Your choice of ribbon can drastically change the look and feel of the bow. For a luxurious look, satin or silk ribbon is an excellent choice, while a rustic gift might benefit from burlap or jute twine. The width and texture of the ribbon are also important – a wider ribbon will create a fuller, fluffier bow, while a narrower ribbon will give you a more delicate, refined appearance.
Step 2: Measure and Cut Your Ribbon
Once you’ve selected your ribbon, measure out the length you’ll need. For a standard bow, 36-48 inches of ribbon is typically enough. If you want a larger, fuller bow, feel free to use more. Use scissors to cut the ribbon neatly, making sure the edges are even. If you want to prevent fraying, you can lightly heat-seal the ends of fabric ribbons by holding them over a candle flame for a second or two.
Step 3: Make the Loops
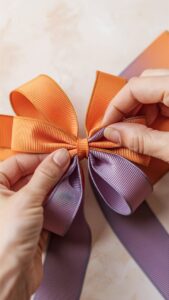
To create the loops of your bow, fold the ribbon back and forth in a fan shape. Start by creating a loop about 4-6 inches wide (depending on how big you want your bow to be) and pinch it together in the center. Continue folding the ribbon back and forth, making each loop the same size. This will create a layered effect for the bow. Don’t worry if it looks a bit uneven at first — you can adjust the loops later.
Step 4: Secure the Bow
Once you’ve made all the loops, pinch the center of the bow tightly to secure them. Use a piece of wire or floral wire to wrap around the center, securing the loops in place. If you don’t have wire, you can also use a small piece of ribbon or string to tie the center. Make sure it’s tight enough to hold the loops together but not so tight that it distorts the shape.
Step 5: Fluff the Bow
Now comes the fun part! Gently pull apart the loops to give the bow some volume. This step is essential for making the bow look full and fluffy, so take your time to adjust each loop and make sure they’re evenly spaced. You can also trim the ends of the ribbon if you want to add a professional touch by cutting them at an angle or into a “V” shape.
Step 6: Add Decorative Accents
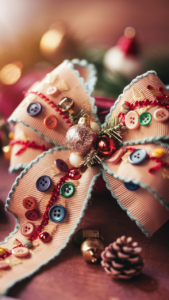
To make your bow even more special, you can add some decorative accents. Small buttons, beads, or even a tiny ornament can be hot-glued to the center of the bow, giving it a personalized touch. This is a great opportunity to match your bow to the theme of your gift — for example, a holiday bow could include a small pinecone or jingle bell in the center.
Step 7: Attach the Bow to the Gift
Finally, it’s time to attach your beautiful bow to the wrapped gift. Position the bow on top of your gift and secure it with a piece of tape or glue. If you’re using a wire or string, simply tie it around the gift and make sure the bow is centered. For an extra touch, you can even tie a small piece of matching ribbon around the package for added elegance.
Tips for Perfect Bow Making
- Experiment with different textures: Don’t be afraid to mix and match different types of ribbon for a more dynamic look. Combining satin with burlap or velvet with twine can give your bow a unique and stylish appearance.
- Go for symmetry: When making the loops, try to keep them as even as possible for a neat and polished finish.
- Personalize the bow: Adding small charms or even a handwritten tag to the center can make the bow feel more personal and meaningful.
Creating your own bows can be a fun and creative way to add a unique touch to your gift wrapping. With just a few simple steps, you can make a bow that looks professionally done, impressing anyone who receives a beautifully wrapped present from you.


